What to do when ultrasound tech puts patient B into patient A's folder.
TECHNOLOGIST
1. Put patient A on Holding status in EZPACS.
2. Select patient B from the DICOM work list and send one image (it doesn't matter what the image is) to EZPACS.
This will give you a new folder for patient B which contains one image with the correct patient name and ID. The patient name/ID on this image will be used to paste overtop of all the images that now incorrectly show patient A's name and ID.
3. Put patient B on Holding status in EZPACS.
IT PERSON
4. Move patient B's images from patient A's folder into the new patient B folder that has just been created in step 1.
Hint: There is usually a clear difference in the file creation time between the two exams. You can also ask the tech how many images belong to each exam.
5. Patient A should be ready for reading now, but ask the tech to check that all the images are there. If she is OK with it, ask him/her to change the EZPACS status back to To Be Read.
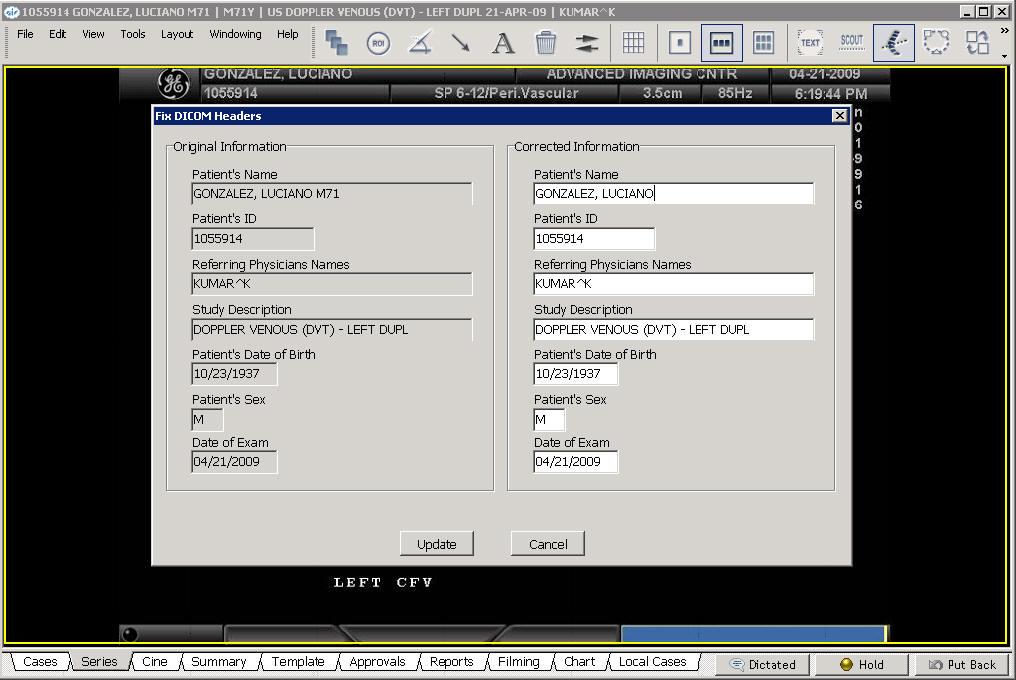
6. Find Patient B's image. This is usually in a separate series. Edit|Fix DICOM Tags.
7. Use EZPACS to download patient B's images to your local disk.
8. Make sure you can paste images into EZPACS.
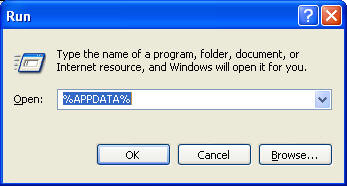
Click Start | Run, then type %appdata%. Click OK.
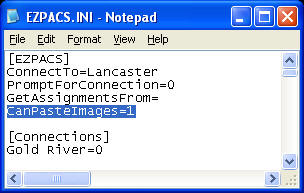
Open EZPACS folder. Open EZPACS.INI and enter CanPasteImages=1 at the bottom of the [EZPACS] section.
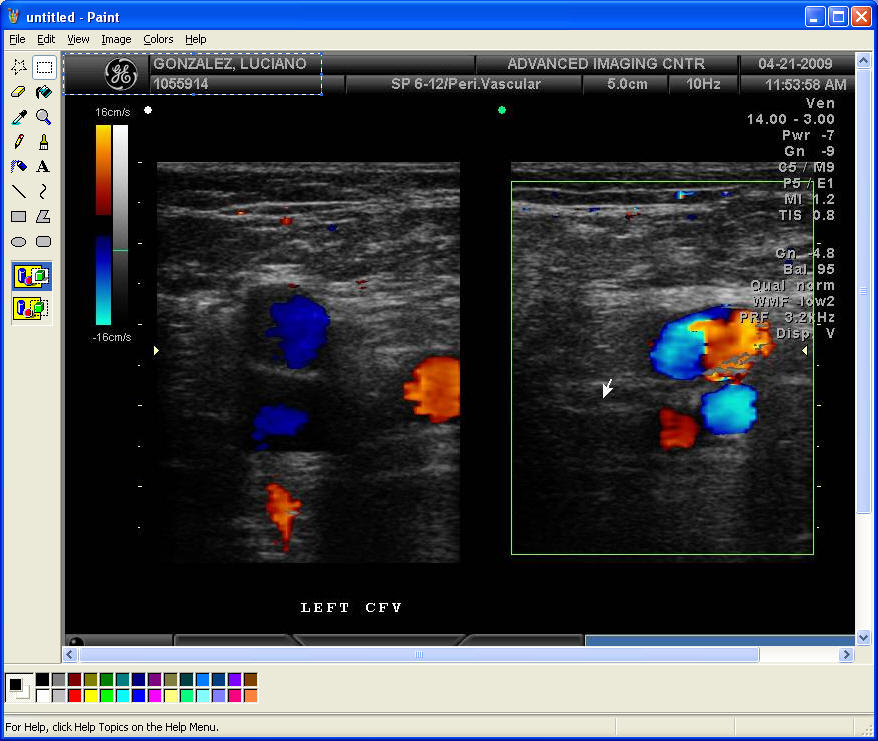
9. Select the one correct image in EZPACS then select Edit | Copy. Open up Paint and paste the image. With the dotted square tool selected, click the bottom right corner of the patient name and ID then drag all the way up and to the right. Copy the selected image that you just put a box around, then select File New and don't save. Now paste your patient/ID box into the new image. As shown below, there should not be any white around the edges. If you have any white, make your paper size tiny and then paste your image again. The paper size will grow to exactly fit your pasted image.
Hint: If the incorrect name is longer than the correct name, make sure the box you draw around the correct name/ID includes enough black space so that the incorrect name will be covered up with black.
10. Copy, in EZPACS, the first image that you want changed. Open another copy of Paint. Paste the first image into Paint. Make sure there is no white "paper" or else your image will be shrunk and include the white when you paste it into EZPACS.
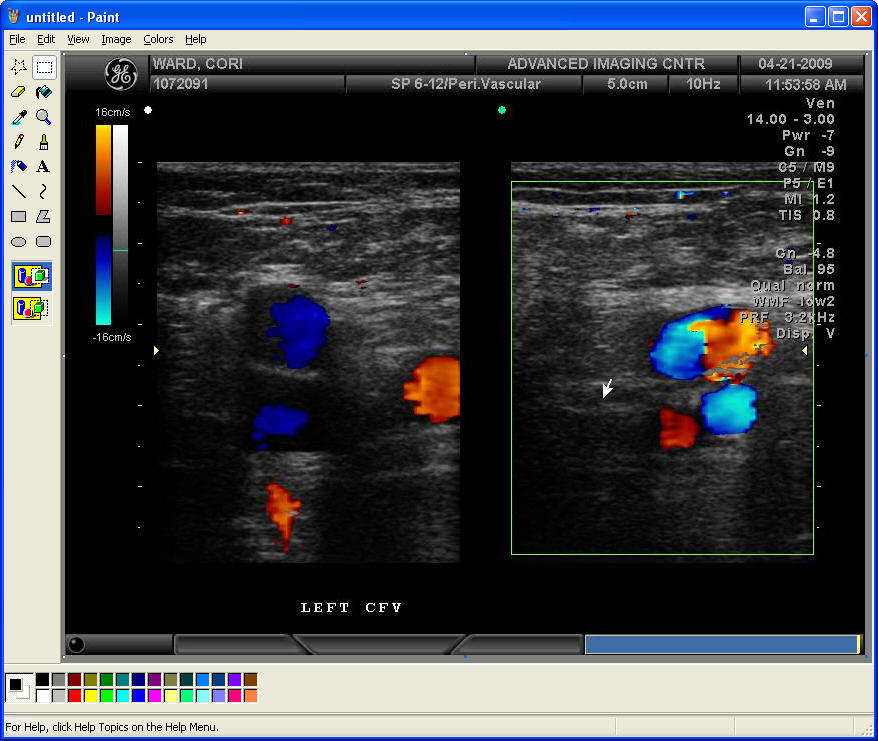
11. Go back to your first Paint program and do Edit | Select all then Edit | Copy. This will copy your image box into the paste buffer as shown below.
![]()
12. Switch back to the image you want to correct then paste your name/ID image. Your image will overwrite the incorrect name/ID. Now select all then copy the whole image.
13. Paste your corrected image over the incorrect image that you just fixed.
14. Now copy the next incorrect image and paste it overtop of the previous correct one that you just finished.
15. Go to your Paint that contains the little image box and copy that.
16. Paste the image box onto the image in step 12.
17. Repeat until you have corrected all the images.
18. Copy the files from your disk onto the EZPACS server into the correct folder.
19. Check that that exam looks correct in EZPACS, then change the status to To Be Read.